How long does it take to install a patio?
A straightforward patio installation may take around one to two weeks of active construction, but larger or more complex projects can take several weeks. The complete project timeline can be longer when design, material selection, permits, drainage work, utilities, outdoor kitchens, retaining walls, or other features are involved.
At Kelly Masonry, we have completed some patio projects in under two weeks, but we don’t recommend planning your project around a universal number. Every property is different.
The timeline depends on what we find at your property and what you want to build.
This guide explains what happens before, during, and after patio installation so homeowners in Delaware County and the Main Line know what to expect.
Patio Installation Timeline at a Glance
A patio project generally moves through these stages:
| Stage | What happens |
| Initial planning | Goals, approximate budget, photos, and project scope |
| On-site consultation | Property, access, drainage, grades, and existing conditions are evaluated |
| Design | Layout, materials, features, and details are finalized when design is needed |
| Pre-construction | Contract, material ordering, scheduling, utility coordination, and permits when required |
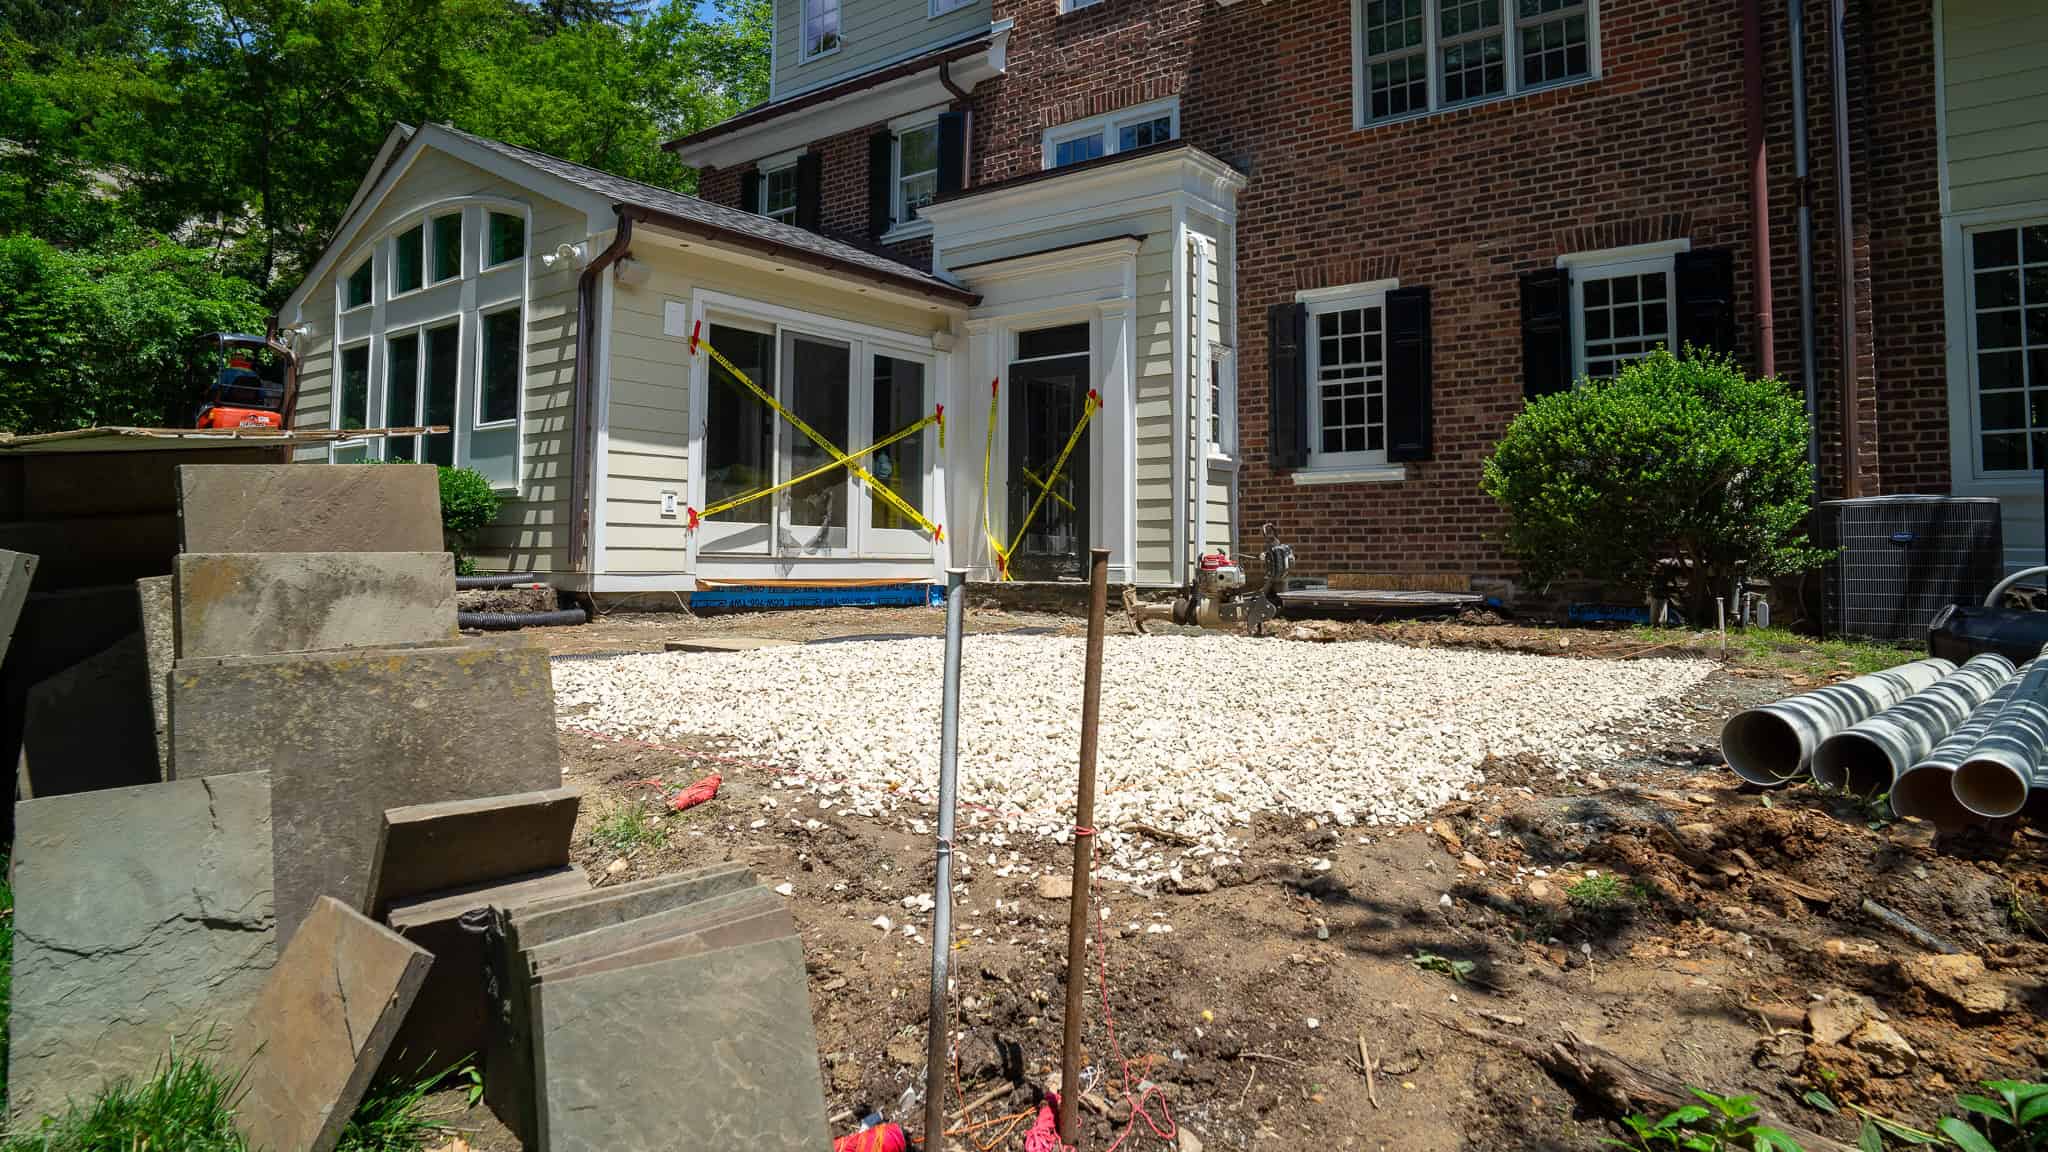
| Site preparation | Work area is protected and existing materials are removed |
| Excavation and base | Soil is excavated and the patio foundation is prepared |
| Drainage and utilities | Drainage, conduit, gas, electrical, or other planned infrastructure is coordinated |
| Patio installation | Pavers, flagstone, or other selected material is installed |
| Finishing | Joints, edges, transitions, cleanup, and surrounding areas are completed |
| Final walkthrough | The completed project is reviewed with the homeowner |
Not every patio requires every step, and several stages may overlap.
How Long Does Patio Installation Take?
For a relatively straightforward patio, one to two weeks of active construction can be possible.
That does not mean every patio can or should be completed within that timeframe.
A larger custom patio may take longer because the project can include:
- Extensive excavation
- Difficult site access
- Drainage improvements
- Retaining walls
- Steps
- Sitting walls
- Fire features
- Outdoor kitchen
- Pergola
- Landscape lighting
- Utility work
- Complex stone patterns
- Significant grading
- Landscaping
The best timeline is based on the actual scope rather than a promise made before the site and design have been evaluated.
Construction Time vs. Total Project Time
This distinction is important.
Construction time is the period when the crew is physically building your patio.
Total project time begins earlier and may include:
- Initial consultation
- Site evaluation
- Design
- Material selection
- Proposal and contract
- Permits or approvals when required
- Material ordering
- Scheduling
- Construction
- Final walkthrough
A patio might require only a couple of weeks of physical construction but have a longer overall planning-to-completion timeline.
If you want a patio ready for a particular event or season, plan around the complete project timeline, not just the number of construction days.
Step 1: Initial Planning and Consultation
The project starts before anyone excavates the yard.
At Kelly Masonry, the first step is to get in touch and share information about the project.
Photos and video can help us understand the existing space before the consultation.
We then discuss questions such as:
- What do you want to use the patio for?
- How many people should it accommodate?
- Are you considering pavers or natural stone?
- Will you need steps?
- Is drainage already a concern?
- Do you want a fire feature?
- Will there be an outdoor kitchen?
- Are you considering a pergola?
- What approximate budget are you working with?
This early conversation helps determine whether the project is straightforward or requires more detailed design and planning.
You can see the complete Kelly Masonry project process here.
Step 2: On-Site Evaluation
Before finalizing a patio plan, the property needs to be understood.
During the site evaluation, important conditions may include:
- Existing grade
- Water movement
- Downspouts
- Soil
- Access
- Existing concrete or paving
- Steps
- Foundations
- Retaining walls
- Trees and roots
- Utilities
- Connections to doors and walkways
This step can have a major effect on the eventual construction timeline.
For example, a patio on an easily accessible, relatively level property may be much more straightforward than a patio on a steep backyard with drainage problems and limited equipment access.
Step 3: Patio Design
Some patios are relatively straightforward. Others are part of a complete outdoor-living design.
Design becomes more important when a project includes:
- Multiple patio levels
- Complex geometry
- Outdoor kitchen
- Fireplace or fire pit
- Pergola
- Sitting walls
- Retaining walls
- Landscape lighting
- Steps
- Drainage
- Landscaping
Kelly Masonry offers a design phase when appropriate for the project.
Planning these elements before construction helps prevent expensive changes after excavation has already started.
Step 4: Choose and Order Materials
Material selection can affect both the construction process and the schedule.
Common patio materials include:
- Concrete pavers
- Pennsylvania bluestone
- Flagstone
- Other natural stone
The installation method is not identical for every material.
Availability can also affect scheduling. A specific stone, color, size, or special-order product may take longer to obtain than a readily available material.
For that reason, make important material decisions before the planned construction date whenever possible.
If you’re still comparing materials, read our guide to choosing the best material for a patio.
Step 5: Permits and Pre-Construction Planning
Permit requirements vary according to the municipality and the scope of work.
A straightforward ground-level patio may be treated differently from a project that also includes:
- Roof structures
- Electrical work
- Plumbing
- Gas
- Significant walls
- Other structural improvements
Requirements can also vary between municipalities in Delaware County.
Do not assume that because a neighbor’s project did not require a particular approval, yours will be the same.
Confirm applicable requirements before construction begins.
Pre-construction planning may also include:
- Utility marking
- Material deliveries
- Equipment access
- Protecting existing property
- Scheduling subcontracted trades
- Reviewing the final layout
Step 6: Protect and Prepare the Site
When construction begins, the first job is preparing the work area.
That can include:
- Protecting areas that will remain
- Establishing equipment access
- Removing furniture or obstacles
- Marking the patio layout
- Confirming elevations
- Reviewing the project with the homeowner
Kelly Masonry includes a pre-job walkthrough so expectations are clear before construction begins.
Step 7: Demolition and Excavation
If an existing patio, walkway, concrete slab, or other material needs to be removed, demolition happens before the new foundation can be built.
The site is then excavated to the depth required for the selected patio system and site conditions.
Excavation sometimes reveals conditions that could not be seen beforehand, including:
- Poor soil
- Buried concrete
- Old construction debris
- Drainage problems
- Unexpected utilities
- Roots
- Failed fill material
These discoveries can affect the timeline because correcting the underlying problem is usually better than building the new patio over it.
Step 8: Drainage and Base Preparation
The work underneath a patio is just as important as the finished surface.
This stage can include:
- Preparing the subgrade
- Installing and compacting aggregate
- Establishing elevations
- Creating proper drainage
- Coordinating downspouts
- Installing planned drainage pipes
- Preparing utility pathways
Drainage deserves particular attention in Delaware County properties where existing grades, downspouts, foundations, and neighboring elevations can influence where water moves.
A patio should not simply look level. It needs to work with the drainage plan for the property.
Step 9: Install the Patio Surface
Once the foundation is ready, installation of the visible patio begins.
The exact process depends on the material and installation system.
This is when the project starts to look like the patio you planned.
The crew may be:
- Setting stone or pavers
- Making cuts
- Maintaining the pattern
- Creating transitions
- Building edges
- Coordinating steps
- Working around drains and utilities
- Checking elevations
A simple paver pattern can progress differently from irregular natural stone that requires more individual fitting and cutting.
Step 10: Joints, Edges, and Finishing Work
After the main patio surface is installed, the remaining details are completed.
Depending on the project, this may include:
- Joint material
- Edge restraints
- Mortared joints
- Steps
- Transitions
- Drainage connections
- Cleaning
- Final grading
- Soil restoration
- Landscape work
If the project includes multiple outdoor-living features, some of these tasks may occur at different points in the overall construction sequence.
Step 11: Final Walkthrough
The project concludes with a walkthrough.
This is the time to review:
- Finished patio
- Steps and transitions
- Drainage
- Joints
- Edges
- Completed features
- Maintenance recommendations
- Any final questions
Kelly Masonry’s process includes a post-job walkthrough as well as follow-up after the project is complete.
What Can Delay a Patio Installation?
Even a well-planned project can encounter delays.
Weather
Rain can interfere with:
- Excavation
- Soil conditions
- Base preparation
- Compaction
- Mortar work
- Joint installation
- Material handling
Some materials and installation products also have temperature or moisture requirements.
A responsible contractor may postpone a step rather than install materials under unsuitable conditions.
Unexpected site conditions
Problems hidden below the existing surface can change the schedule.
Examples include:
- Poor soil
- Buried construction debris
- Unknown concrete
- Drainage problems
- Utility conflicts
- Tree roots
Material availability
Special-order stone, pavers, accessories, or custom components may affect the start date or progress of the project.
Design changes
Changing the patio size, material, pattern, steps, walls, or other features after work has begun can extend the schedule.
Finalizing the major decisions before construction is one of the best ways to keep a project moving.
Additional features
A patio with only a sitting area is different from a complete outdoor-living project containing a:
- Fireplace
- Fire pit
- Outdoor kitchen
- Pergola
- Sitting wall
- Retaining wall
- Lighting system
- Drainage system
Each additional feature creates more construction stages and coordination.
Does Patio Material Affect the Timeline?
Yes.
Different materials require different preparation, cutting, fitting, setting, jointing, and curing procedures.
Pavers
Manufactured pavers have consistent dimensions, which can make layout and installation predictable once the foundation is ready.
Complex patterns, borders, curves, and detailed cuts can add time.
Flagstone and natural stone
Natural stone varies in shape, thickness, color, and texture.
Irregular flagstone may require more sorting, cutting, and fitting than dimensional manufactured products.
If you’re considering natural stone, read our complete guide to flagstone.
How Can You Help Keep Your Patio Project on Schedule?
Homeowners can help avoid preventable delays by making important decisions before construction begins.
Before your project starts:
- Finalize the patio size and layout.
- Approve the materials.
- Select major features and appliances.
- Discuss drainage early.
- Confirm how the crew will access the yard.
- Move furniture and personal items when requested.
- Make sure pets are safely separated from the construction area.
- Avoid making major design changes once construction begins.
- Ask about material lead times.
- Tell your contractor about important deadlines before scheduling.
If you’re hoping to use the patio for a graduation, party, wedding, or other event, mention that during planning—not after construction has begun.
When Is the Best Time to Start Planning a Patio?
If you want to enjoy a new patio during spring or summer, it is better to begin planning before you need the space.
Design, material decisions, scheduling, and possible approvals happen before construction.
Waiting until the week you want to use the patio is usually too late.
Starting earlier also gives you more time to make decisions about:
- Patio size
- Material
- Furniture layout
- Fire features
- Outdoor kitchen
- Pergola
- Lighting
- Landscaping
How Much Should You Budget for a Patio?
Timeline and budget often change together because larger and more complex projects require more work.
For planning purposes, our patio projects generally fall into these ranges:
| Patio project | Typical range |
| Basic patio | Around $20,000 |
| Average patio | Around $40,000 |
| High-end custom patio | $60,000+ |
These are planning figures rather than fixed prices. Size, material, access, drainage, site conditions, and additional features can all change the final investment.
For a detailed breakdown, read our patio installation cost guide or review our project pricing.
A Real Patio Timeline Is Better Than a Generic Promise
You may see contractors or websites promise that a patio takes a specific number of days.
That number is not very useful without knowing the scope.
Kelly Masonry has completed a full patio in under two weeks, but that does not mean every project should follow the same schedule.
A more useful question is:
What needs to happen on my property before this patio is ready to use?
Once the site conditions, design, materials, drainage, features, and approvals are understood, the contractor can provide a much more realistic schedule.
Frequently Asked Questions
How long does it take to install a patio?
A straightforward patio may take around one to two weeks of active construction, while larger custom patios and complete outdoor-living projects can take several weeks. Site conditions, materials, weather, drainage, and additional features all affect the schedule.
Can a patio be installed in one week?
Some smaller or straightforward projects may be completed quickly, but one week should not be treated as a standard timeline for every patio.
How long does a paver patio take to install?
The schedule depends on size, excavation, base preparation, access, pattern, cuts, drainage, and additional features. The pavers themselves are only one stage of the project.
Does flagstone take longer to install than pavers?
It can. Irregular natural stone may require additional sorting, fitting, and cutting compared with consistently sized manufactured pavers.
What part of patio installation takes the longest?
There is no universal answer. Excavation and base preparation, drainage corrections, detailed stonework, walls, steps, or additional outdoor-living features can all become significant parts of the schedule.
Does rain delay patio installation?
It can. Heavy rain may affect excavation, soil stability, compaction, mortar, jointing products, and other construction stages.
How far in advance should I schedule a patio installation?
Begin planning well before the date you want to use the patio. Consultation, design, material selection, approvals when applicable, ordering, and contractor scheduling can all happen before construction starts.
Can I stay home during patio installation?
Usually, but expect noise, equipment, deliveries, dust, and temporary disruption around the construction area. Your contractor should explain access and safety expectations before work begins.
When can I use my new patio?
That depends on the installation system and materials. Some patios may be usable shortly after completion, while mortar, concrete, sealers, or joint products may require curing time. Follow the contractor’s and product manufacturer’s instructions.